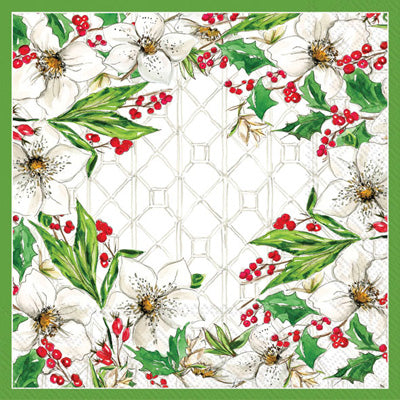
Welcome to the vibrant world of decorative paper napkins for decoupage! If you’re here, you’re likely looking to elevate your crafting game with a fun and expressive medium. My journey with decoupage began as a simple experiment, and it quickly unfolded into a full-fledged passion. This guide will provide you with in-depth insights, practical tips, and a treasure trove of techniques to inspire your next project.
What is Decoupage?
Before diving into the details about decorative paper napkins, let’s briefly touch on what decoupage is. Originating from the French word “decouper,” which means “to cut out,” decoupage is the art of decorating an object by gluing colored paper cutouts onto it in combination with special paint effects. This technique can transform mundane objects into stunning art pieces.
Why Use Decorative Paper Napkins for Decoupage?
Decorative paper napkins are a popular choice for decoupage for several reasons:
- Variety: They come in countless patterns, colors, and themes, allowing for endless creativity.
- Thin Material: Their lightweight nature makes them easy to work with and ideal for layering.
- Accessibility: Decorative napkins are widely available and often inexpensive.
- Texture: They can add a beautiful texture to your decoupage projects, enhancing the overall aesthetic.
The Basics: Choosing the Right Decorative Paper Napkins
When selecting paper napkins for your projects, consider the following:
- Design: Choose a design that resonates with your style and the intended project.
- Quality: Opt for high-quality napkins that won’t tear easily during application.
- Layering: Look for napkins that have multiple layers; you’ll often need to separate them to achieve better results.

Tools and Materials Needed for Decoupage with Napkins
To get started, you’ll need some basic supplies. Here’s a list of essentials:
Essential Tools
| Tool | Description |
|---|---|
| Scissors | For cutting out your desired napkin designs. |
| Brushes | A range of brush sizes (flat, round, sponge) for applying glue and sealant. |
| Adhesive | A craft glue or decoupage medium specifically designed for this type of project. |
| Sealant | To protect your finished piece; use varnish or a glossy sealer. |

Surface Options for Decoupage
You can decoupage on various surfaces such as:
- Wood (furniture, boxes, etc.)
- Glass (jars, vases, etc.)
- Ceramics (plates, tiles, etc.)
- Paper Mache (for craft projects)
Step-by-Step Guide to Decoupage with Decorative Paper Napkins
Now let’s dive into the practical aspect of decoupage. Follow these steps to create your own masterpiece.

Step 1: Prepare Your Surface
Ensure that your chosen item is clean and dry. If you’re using wood, consider sanding it lightly for a smoother finish.
Step 2: Select and Prepare Your Napkin
Choose your decorative napkin and peel apart the layers. Most napkins have three plies, and you’ll want to work with the top layer featuring the design.

Step 3: Cut Out Your Design
Using scissors, cut out the images or designs you plan to use, making sure to leave a bit of a border for blending.
Step 4: Apply Adhesive
Using a brush, apply a thin layer of your adhesive to the surface where your napkin will be placed.

Step 5: Position the Napkin
Carefully place the napkin on the adhesive, smoothing it out gently to avoid wrinkles. Use your brush to apply more adhesive over the top of the napkin.
Step 6: Seal the Project
Once dry, apply a sealant to protect your work. For a glossy finish, a varnish can add beautiful depth!

Creative Project Ideas Using Decorative Paper Napkins
Want some inspiration? Here are a few creative projects you can try:
Decorative Boxes
Transform plain boxes into vibrant storage solutions. Use napkins with floral patterns for a romantic touch.

Customized Plates
Use decorative napkins to create unique dinnerware. Remember to seal well for durability.
Wall Art
Create stunning wall art by decoupaging napkins on canvas or wood boards for a splash of color.
Tips for Successful Decoupage with Napkins
Here are some tried-and-true tips to ensure your success:
- Work in a well-lit area: This helps you see details better while applying.
- Practice on scrap materials: Get familiar with the technique before working on your final piece.
- Don’t rush: Allow each layer to dry thoroughly before proceeding.
FAQs About Decorative Paper Napkins for Decoupage
1. Can I use any type of napkin for decoupage?
While you can technically use any napkin, decorative paper napkins designed for crafting tend to yield the best results due to their quality and design.
2. How do I prevent wrinkles in my napkin during application?
Smoothly apply the napkin from the center outwards, and consider using a brayer or a soft cloth to gently press it down.
3. Can I use regular school glue for decoupage?
While school glue might work in a pinch, it’s best to use a decoupage medium for optimal adhesion and durability.
4. How do I clean my decoupaged items?
Wipe with a damp cloth, but avoid soaking them to prolong the life of the finish.
5. What is the best way to store decorative napkins?
Keep them flat in a cool, dry place to prevent them from crumpling or tearing.
Conclusion: Unleash Your Creativity!
Decorative paper napkins for decoupage offer an exciting avenue to express yourself and personalize your home decor. As you embark on your crafting journey, remember that practice makes perfect. Each project is a chance to learn and develop your style. So gather your supplies and let your creativity flow—I can’t wait to see what you create!