Are you looking to add a unique and creative touch to your home? Paper mache wall decor is a fantastic way to infuse personality into your living space. In this article, I’ll share my personal experiences, tips, and various ideas for utilizing paper mache in your home decor. Let’s embark on this artistic journey together!
What is Paper Mache?
Paper mache, derived from the French term “papier mâché,” means “chewed paper.” This craft involves creating items by layering strips of paper soaked in adhesive substances, typically glue or starch. Once dry, the material becomes sturdy and can be painted or decorated to suit your style.
History of Paper Mache
The art of paper mache dates back to ancient China, where it was originally used for making lightweight armor and decorative items. Over the years, it has evolved into a beloved craft worldwide, with numerous styles and techniques. Its versatility makes it perfect for decor, specifically wall art.
Why Choose Paper Mache Wall Decor?
Paper mache offers a plethora of advantages that make it an excellent choice for wall decor:
- Lightweight: Unlike traditional wall art materials, paper mache is easy to hang and reposition.
- Affordable: Crafting your own pieces can save money, allowing for a more budget-friendly decor solution.
- Eco-friendly: Utilizing recycled paper contributes to sustainability and reduces waste.
- Customizable: You can personalize your creations in terms of shape, color, and size to match any room’s aesthetic.
Personal Experience: My First Paper Mache Project
My journey into paper mache wall decor began on a rainy afternoon. I was looking for a new hobby and stumbled upon a DIY tutorial online. Armed with newspaper, flour, and water, I created my first wall hanging – a vibrant sunburst design. The joy I felt as it transformed from a simple paper mess to a stunning piece of art was incredible. It ignited my passion for crafting and led to countless projects!

Getting Started with Paper Mache Wall Decor
Essential Materials
Before diving into your project, gather the following materials:
- Newspaper or paper of your choice
- Flour and water (for glue) or PVA glue
- Balloon or mold for shaping
- Paints and brushes
- Sealer (optional)

Basic Paper Mache Technique
- Prepare your workspace, covering surfaces to avoid mess.
- Mix flour and water to create glue, or use PVA glue directly.
- Soak strips of paper in glue, then apply them to your mold.
- Layer until you achieve the desired thickness, typically 3-4 layers.
- Allow to dry completely, which can take 24-48 hours.
- Once dry, remove from the mold, paint, and decorate as desired.
Creative Ideas for Paper Mache Wall Decor

1. Wall Sculpture
Create 3D wall art that pops out from your walls. Start with abstract shapes or organic designs that mimic nature.
Examples of Wall Sculptures
- Floral designs
- Animal figures
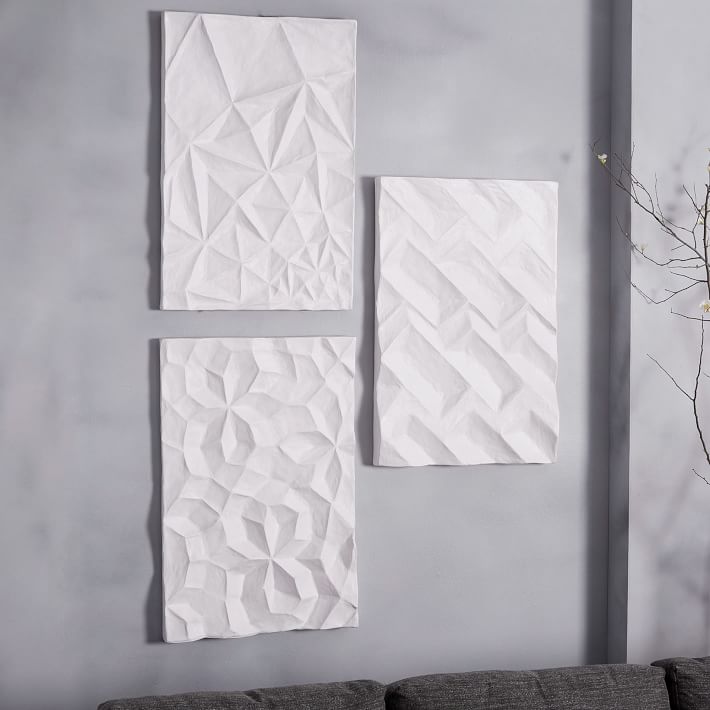
- Geometric patterns

2. Decorative Masks
Crafting paper mache masks can be an exciting way to express creativity. Use them as wall hangings or party decorations!
3. Shadow Boxes
Combine paper mache with box frames to create shadow boxes filled with thematic items or memories.

How to Create a Shadow Box
- Select a theme (beach, travel, etc.).
- Use paper mache to create elements fitting your theme.
- Arrange and adhere them inside a shadow box frame.
- Seal the frame for protection.
4. Textured Wall Panels
For a bold statement, create textured panels that can be mounted on walls as part of a gallery display. Experiment with different textures and finishes!

Tips and Tricks for Successful Paper Mache Projects
Choosing the Right Adhesive
While traditional flour paste works well, PVA glue offers greater strength and quicker drying times. Depending on your project type, choose the adhesive that suits your needs.
Sealing and Finishing
After painting your creations, consider sealing them with a clear coating to protect the paint and enhance longevity. This is particularly important if you plan to hang them in humid areas.
Pros and Cons of Paper Mache Wall Decor
| Pros | Cons |
|---|---|
| Inexpensive materials | Time-consuming process |
| Endless design possibilities | May require practice to master |
| Eco-friendly options | Can be messy to work with |
| Lightweight for easy display | Durability can vary |
Inspiring Paper Mache Projects to Enhance Your Home Decor
1. Seasonal Decor
Create decorations for different seasons — think pumpkins for fall, snowflakes for winter, and flowers for spring.
2. Personalized Gifts
Handcrafted paper mache items can serve as heartfelt gifts for friends and family.
3. Kids’ Room Decor
Engage children in crafting personalized wall hangings to decorate their own spaces. This not only fosters creativity but also builds fond memories.
Maintaining and Caring for Your Paper Mache Decor
Regular Dusting
Use a soft cloth or feather duster to regularly remove dust from your paper mache creations.
Repairing Damages
If your piece suffers damage, you can easily repair it with more paper mache technique or paint touch-ups.
Frequently Asked Questions (FAQs)
Is paper mache durable enough for wall decor?
Yes, with proper layering, sealing, and care, paper mache can be quite durable for wall decor.
Can paper mache be used outdoors?
While paper mache can be used outdoors if sealed appropriately, it’s generally best suited for indoor decor due to its sensitivity to moisture.
How do I expedite the drying process of paper mache?
To speed up drying, use a fan or place your project in a warm, dry area. However, make sure it’s not too hot, or the paper may warp.
Conclusion
As I wrap up this exploration into paper mache wall decor, I hope you feel inspired to embark on your own creative journey. Whether you decide to create vibrant wall sculptures, personalized gifts, or decorative masks, the only limit is your imagination! Paper mache is more than just a craft; it’s a means of expressing yourself and enhancing your living space.
Share your own experiences and creations with this wonderful medium, and get ready to transform your home!