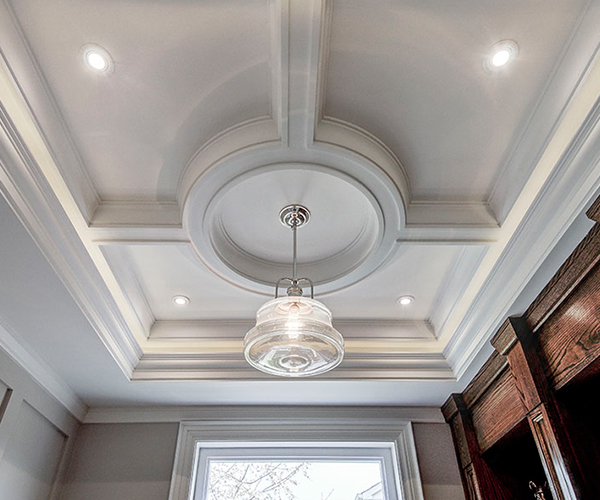
If you’re looking to add a touch of elegance and character to your home, decorative ceiling trim is a fantastic option. As someone who loves design and has personally transformed spaces using trim, I can attest to its ability to elevate a room’s atmosphere dramatically. In this comprehensive guide, we’ll explore various aspects of decorative ceiling trim, including styles, materials, installation tips, and maintenance advice, ensuring your project is a successful one.
What is Decorative Ceiling Trim?
Decorative ceiling trim, commonly referred to as crown molding, is a type of trim installed at the junction of walls and ceilings. This decorative element can enhance a room’s architectural style, adding depth and visual interest. Decorative ceiling trim comes in various styles, materials, and sizes, allowing for flexibility in design.
Types of Decorative Ceiling Trim
1. Crown Molding
Crown molding is the most popular type of decorative ceiling trim, characterized by its curved profile that softens the transition between the wall and ceiling. Available in various materials and profiles, it fits both modern and traditional styles.
2. Ceiling Medallions
Ceiling medallions are ornamental pieces that can be placed around light fixtures or ceiling fans. They add a focal point and can be found in intricate designs or simpler forms, catering to various tastes.
3. Beams and Planks
Exposed beams and wooden planks can provide a rustic or industrial look. These can be actual beams or faux ones made from lightweight materials, creating a stunning visual impact.
4. Chair Rail Molding
While typically used on walls, chair rail moldings can also contribute to decorative effects near ceilings. This style can create a cohesive look when paired with crown molding.
Materials Used in Decorative Ceiling Trim
When choosing decorative ceiling trim, the material significantly impacts aesthetics, durability, and installation ease. Here’s a breakdown of popular materials:
| Material | Pros | Cons |
|---|---|---|
| Wood | Classic look, customizable | Requires maintenance, can warp |
| Polyurethane | Lightweight, moisture-resistant | Less authentic look |
| Polystyrene | Easy to install, affordable | Less durable |
| Fiberglass | Very durable, intricate designs | Higher cost |
Choosing the Right Style for Your Home
Deciding on the right style of decorative ceiling trim largely depends on the overall design and purpose of the space. Here are some tips:
1. Match Your Trim to Your Home’s Architecture
If your home has traditional architectural features, opt for ornate crown molding. For modern spaces, sleek and simple profiles work best.

2. Consider the Height of Your Ceilings
Higher ceilings can accommodate taller crown moldings and more intricate designs. Conversely, smaller rooms benefit from simpler, lower trim to avoid making the space feel cramped.
3. Color Coordination
Choose trim colors that complement your walls and ceilings. Traditional white trim works in most cases, but consider bold colors for dramatic effects.

Installation Steps for Decorative Ceiling Trim
Installing decorative ceiling trim may seem daunting, but with the right tools and guidance, it can be a rewarding DIY project.
Tools and Materials Needed
- Measuring tape
- Miter saw
- Level
- Caulk
- Brads or screws
- Paint or wood finish

Step-by-Step Installation Guide
- Measure the Space: Carefully measure the perimeter of the room to determine how much trim you need.
- Cut the Trim: Use a miter saw to cut the trim at a 45-degree angle for the corners.
- Test Fit the Pieces: Before securing, dry-fit the pieces to ensure a perfect fit.
- Secure the Trim: Use brads or screws to attach the trim to the wall. Ensure it’s level.
- Fill Gaps: Use caulk to fill any gaps between the trim and wall or ceiling.
- Paint or Stain: Finish the trim with paint or stain to match your desired aesthetic.
Maintenance Tips for Your Decorative Ceiling Trim
Once your decorative ceiling trim is installed, maintaining its beauty is essential. Here are some tips:
1. Regular Dusting
Dust can accumulate on trim surfaces, so regular dusting with a microfiber cloth is important. For areas with more grime, a damp cloth can be used.
2. Check for Damage
Periodically check for signs of wear and tear, especially in wood trim that may be susceptible to warping or pest damage.
3. Freshen Up Finishes
Repainting or re-staining your trim can breathe new life into your space and maintain its charm. Aim to refresh finishes every few years, depending on wear.
Pros and Cons of Decorative Ceiling Trim
Pros
- Adds architectural interest
- Increases property value
- Offers design versatility
- Can conceal imperfections
Cons
- Can be expensive based on materials
- Requires meticulous installation
- Maintenance needed for longevity
FAQs about Decorative Ceiling Trim
What is the best material for decorative ceiling trim?
Polyurethane is popular due to its lightweight nature and moisture resistance, while wood offers a classic appeal but requires more maintenance.
Can I install ceiling trim myself?
Yes! With the right tools and patience, most homeowners can successfully install decorative ceiling trim. Just follow a step-by-step guide.
How do I choose the right style of trim for my room?
Consider your room’s existing décor, architectural style, and ceiling height. Matching the trim style to these elements will create a cohesive look.
What tools are necessary for installation?
You’ll need a miter saw, measuring tape, level, caulk, and either brads or screws to secure the trim in place.
Conclusion
Decorative ceiling trim is an exceptional way to enhance your home’s aesthetic and value. Whether you opt for traditional crown molding or modern beams, the right choice can transform any space. Remember, while installation may require some effort, the payoff—both visually and in terms of satisfaction—is immense. I hope this guide serves you well in your decorative endeavors!
Additional Resources for Your Decorative Ceiling Trim Project
For more inspiration and detailed guides, check out the following resources: