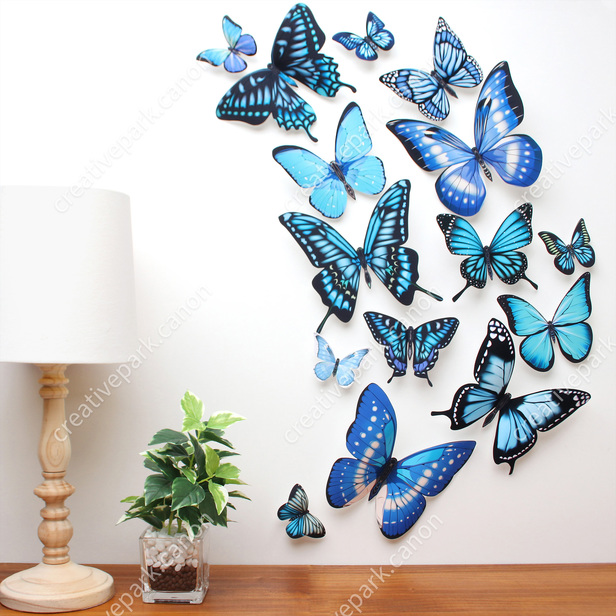
Are you looking to breathe new life into your home decor? One of the most charming and creative ways to do this is by incorporating mariposas para decorar paredes en 3D (3D butterflies for wall decoration). Not only do they add a whimsical touch, but they also create a dynamic visual experience that can transform any dull wall into a focal point of art and creativity. In this article, we will explore everything you need to know about 3D butterfly decor, from choosing the right styles to placement ideas, and even DIY options!
Understanding 3D Butterfly Wall Decor
3D butterfly wall decor has become a popular choice for homeowners and interior designers alike. It offers a versatile and expressive way to enhance the aesthetics of your living space. But what exactly does 3D butterfly decor entail? Let’s dive into its characteristics.
What is 3D Butterfly Wall Decor?
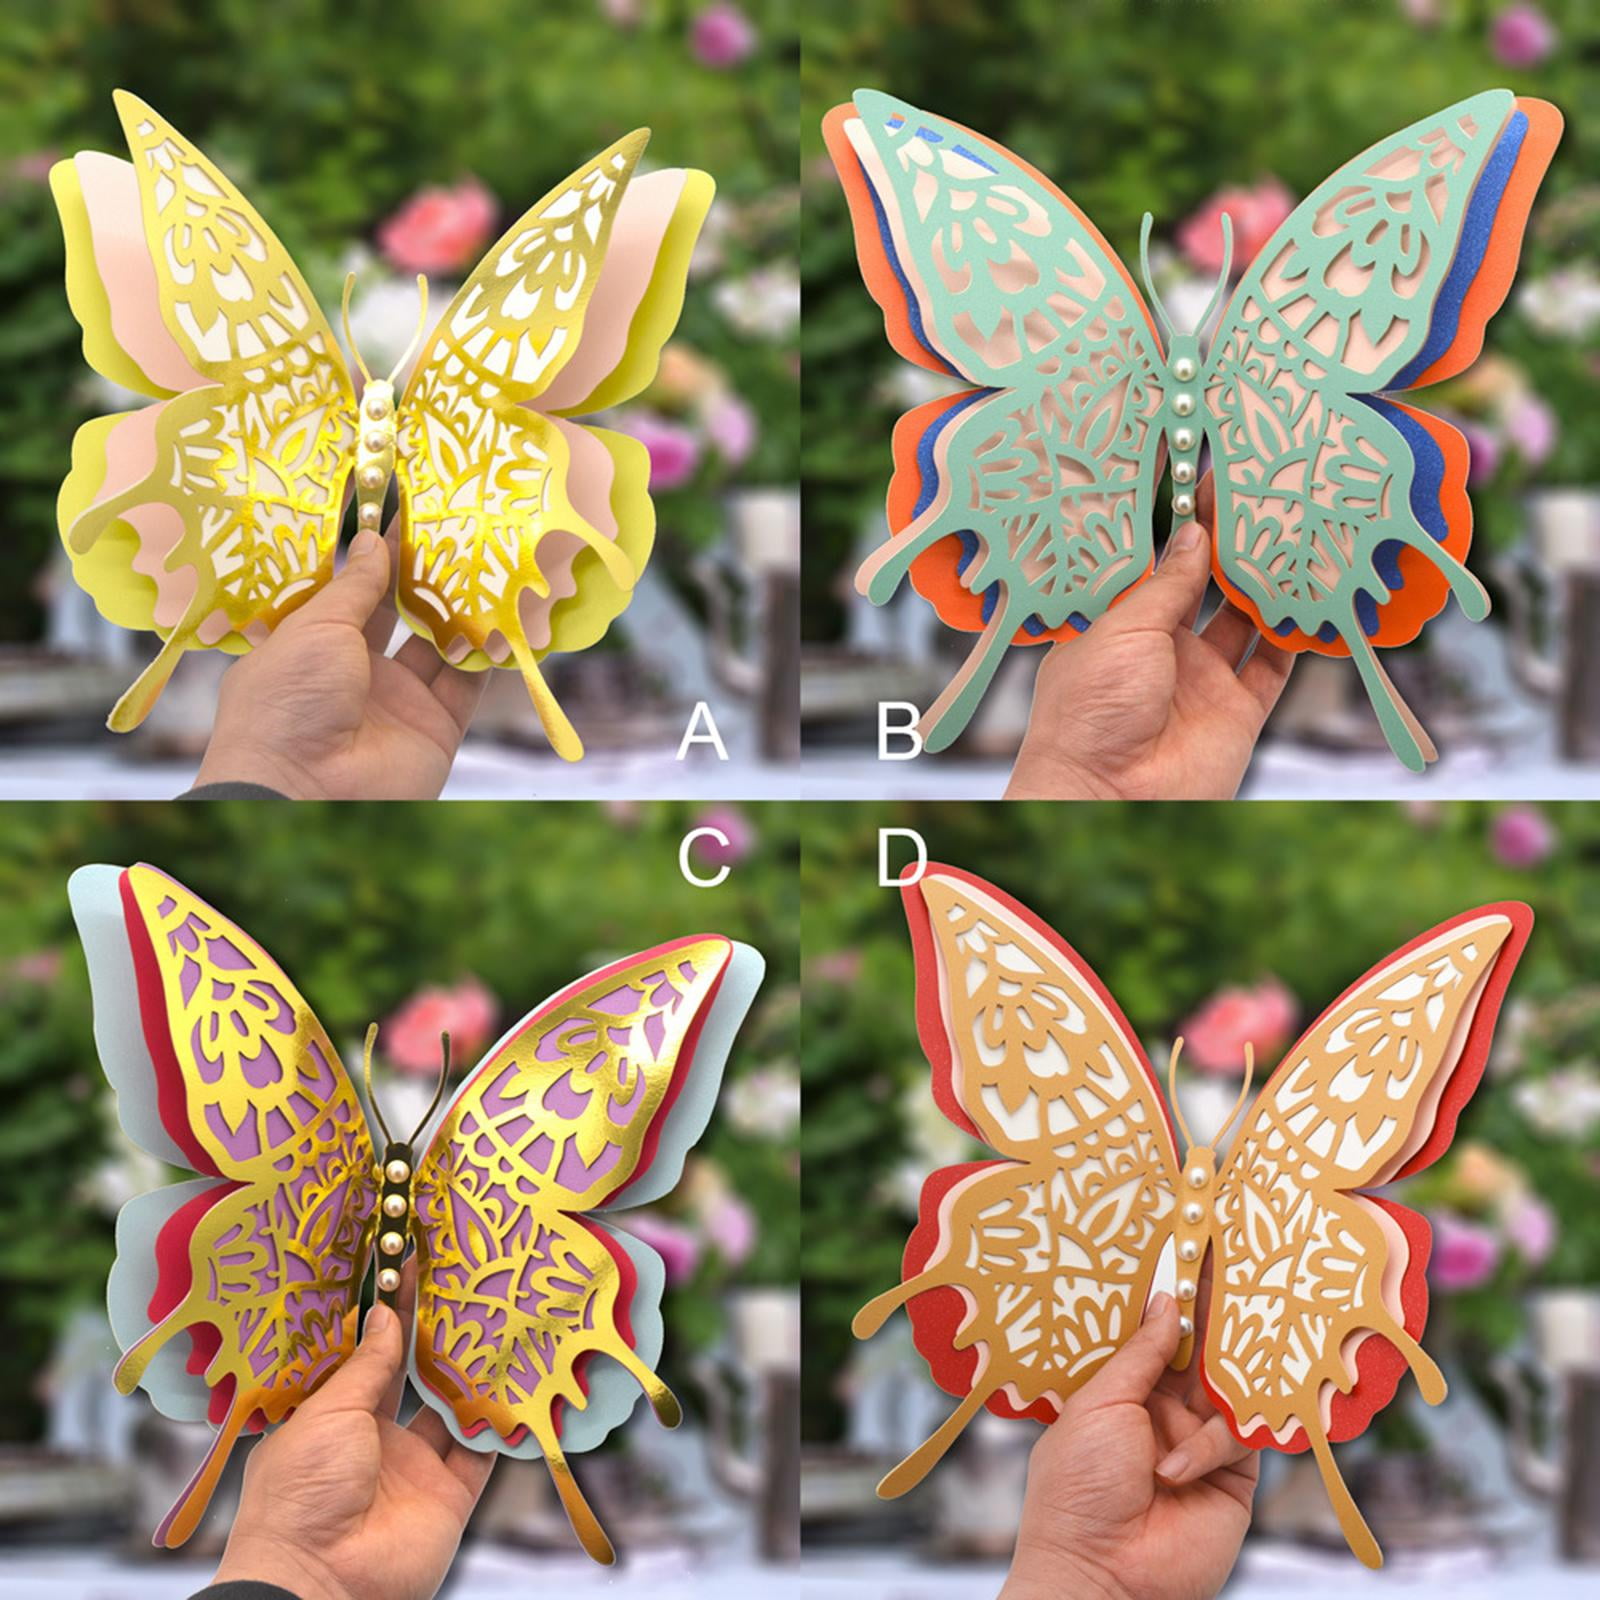
3D butterfly wall decor consists of decorative butterflies made from various materials such as paper, plastic, or wood, designed to be mounted on walls. These butterflies often come in vibrant colors and are available in different sizes, giving you the flexibility to create a unique design. The 3D aspect refers to their ability to stand out from the wall, adding depth and dimension to your decor.
Why Choose 3D Butterfly Decor?
- Visual Appeal: 3D butterflies offer an eye-catching design that draws attention.
- Versatility: Suitable for any room, from children’s bedrooms to living areas.
- Easy to Install: Most options come with adhesive backing or easy mounting mechanisms.
- Customizable: You can mix colors and sizes to match your decor theme.

Different Styles of 3D Butterfly Wall Decor
When it comes to 3D butterfly wall decorations, the options are endless. Let’s explore some popular styles you can choose from to fit your personal taste and interior design.

1. Paper Butterflies
Paper butterflies are lightweight, budget-friendly, and available in a multitude of colors and patterns. They are perfect for a DIY touch, allowing you to design your own butterflies with patterned paper.

Pros and Cons of Paper Butterflies
| Pros | Cons |
|---|---|
| Lightweight and easy to mount | Less durable than other materials |
| Customizable with DIY projects | May fade in direct sunlight |
2. Metal Butterflies

Metal butterflies bring a touch of elegance and sophistication to your wall decor. They are durable and can be painted in various colors to fit your style.
Pros and Cons of Metal Butterflies
| Pros | Cons |
|---|---|
| Durable and long-lasting | Heavier, requiring stronger adhesive |
| Elegant appearance | Can be more expensive |
3. Wooden Butterflies
Wooden butterflies offer a rustic charm and can be painted or left natural for a more organic feel. They are perfect for a nature-themed decor.

Pros and Cons of Wooden Butterflies
| Pros | Cons |
|---|---|
| Eco-friendly option | Heavier than paper and plastic |
| Adds warmth to the decor | May require occasional maintenance |
How to Install 3D Butterfly Wall Decor
Installing 3D butterfly wall decor is a straightforward process, making it accessible for everyone from DIY enthusiasts to those less experienced in home decor projects. Here’s a step-by-step guide for a seamless installation:
Materials Needed
- 3D butterfly decor
- Measuring tape
- Pencil
- Adhesive (if not included)
- Level (optional)
Step-by-Step Installation Guide
- Plan Your Design: Use a measuring tape to decide where you want to place the butterflies. Visualize how the arrangement will look before you start.
- Mark the Spots: With a pencil, lightly mark where each butterfly will go. This will help ensure an even layout.
- Prepare the Butterflies: If they require adhesive, apply it to the back according to the product instructions.
- Attach the Butterflies: Press each butterfly firmly into place on the wall, ensuring they are secure.
- Final Touches: Step back and evaluate the overall look. Adjust any butterflies that may need repositioning.
Creative Placement Ideas for 3D Butterflies
Where you place your 3D butterfly decor can greatly affect the overall aesthetic of your space. Here are some creative ideas for using these charming decorations:
1. Accent Walls
Consider creating a dedicated accent wall in a bold color where the butterflies can pop. Use a variety of sizes and colors for a stunning effect.
2. Above Furniture
Placing butterflies above furniture, such as a sofa or bed, can create a cohesive look, drawing the eye upwards and adding depth to the room.
3. In a Cluster
Group butterflies together in clusters for a more dramatic effect. This approach works well in children’s rooms or creative spaces.
4. Mixed Media Arrangements
Combine your butterfly decor with other wall art such as framed photos, paintings, or shelves for a unique, layered effect.
DIY 3D Butterfly Wall Decor
If you’re feeling crafty, making your own 3D butterfly wall decor can be a fun and rewarding project. Here’s how you can create your own butterflies using simple materials.
Materials Needed for DIY 3D Butterflies
- Colored cardstock or scrapbook paper
- Scissors
- Glue
- Wire or thin wooden dowels (optional for 3D effect)
- Adhesive for mounting
Steps to Create Your Own Butterflies
- Design Your Butterfly: Sketch out your butterfly design on paper first. You can find templates online or create your own.
- Cut Out Butterflies: Use colorful cardstock to cut out your butterfly shapes. Be creative with shapes and sizes!
- Add Dimension: If you want a 3D effect, fold the wings slightly. You can also add a wire or wooden dowel to lift them off the wall.
- Mounting: Use adhesive to attach your butterflies to the wall creatively. You can have them fluttering or in a more static position.
Frequently Asked Questions about 3D Butterfly Wall Decor
1. Are 3D butterfly wall decorations easy to remove?
Yes, most 3D butterfly wall decorations come with adhesive that allows for easy removal. However, always check the product description to ensure it won’t damage your walls.
2. What materials are best for outdoor use?
If you plan to use butterfly decor outdoors, choose metal or plastic options that are weather-resistant. Avoid paper decorations as they may deteriorate over time in the elements.
3. How many butterflies should I use for a wall?
The number of butterflies depends on the size of your wall and the effect you want to achieve. Start with a few and add more if desired, creating a gradual look.
4. Can I paint my 3D butterfly decor?
Yes! Most materials can be painted to fit your color scheme. Just ensure you use the right type of paint for the material (spray paint works well for metal, while acrylic is great for wood).
Conclusion: Embrace the Beauty of 3D Butterflies
Decorating with 3D butterflies can add a playful and artistic flair to your space. Whether you opt for store-bought decor or decide to create your own, these charming elements can transform any room into a beautiful haven. Let your creativity soar as you design your own butterfly wall, and enjoy the fresh and lively atmosphere they bring!
Remember, choosing the right materials, colors, and placements can make a significant difference in your overall decor style. So gather your supplies, get inspired, and dive into the delightful world of 3D butterfly wall decor!