Chocolate is more than just a sweet treat; it’s an art form. Whether you’re looking to impress friends at a dinner party, create stunning gifts, or add a touch of elegance to your desserts, learning how to decorate chocolate can elevate your culinary skills dramatically. In this extensive guide, I’ll share insights and techniques from my own experiences to help you master the art of chocolate decoration.
Understanding Chocolate: Types and Their Uses
Before diving into decoration techniques, it’s essential to understand the different types of chocolate and their properties. Here are the major types:
- Dark Chocolate: Rich in cocoa solids and devoid of milk, dark chocolate has a deep flavor and is the go-to choice for intense decorations.
- Milk Chocolate: Sweeter and creamier due to the addition of milk solids, this chocolate is perfect for those who prefer a softer taste.
- White Chocolate: Made from cocoa butter, sugar, and milk solids without cocoa solids, white chocolate provides a sweet and creamy foundation for decorations.
- Couverture Chocolate: Specialized chocolate with a higher cocoa butter content, ideal for tempering and coating.
Essential Tools for Chocolate Decoration

Having the right tools makes the chocolate decoration process efficient and enjoyable. Here are some essentials:
- Chocolate Melting Pot: Ensure an even melt for smooth chocolate.
- Offset Spatula: Great for spreading and creating smooth surfaces.
- Food Bags and Piping Tips: Perfect for intricate designs and decorations.
- Silicone Molds: Ideal for creating unique shapes and patterns.
- Palette Knife: Useful for spreading and sculpting chocolate.
Comparison Table of Chocolate Tools
| Tool | Function | Pros | Cons |
|---|---|---|---|
| Chocolate Melting Pot | Evenly melts chocolate | Temperature control, consistent results | Can be more expensive than a microwave |
| Offset Spatula | Spreading chocolate | Easy to maneuver, flexible | Requires practice for precision |
| Piping Bags | Intricate designs | Versatile, easy to clean | May require practice to avoid mess |

Techniques for Decorating Chocolate
Once you’re equipped with the necessary tools, it’s time to explore different decoration techniques. Here are some of my favorite methods:

1. Chocolate Drip
The chocolate drip technique adds an elegant touch to cakes and desserts.
How to Achieve a Perfect Drip
- Melt chocolate until smooth.
- Allow to cool slightly before pouring.
- Pour over the edge of your dessert and let it drip naturally.
Tips for Success
- Use a thicker consistency for a more dramatic drip.
- Experiment with white and dark chocolate for contrast.
2. Chocolate Shavings and Curls
Chocolate shavings can be used to create beautiful garnishes.
Creating Shavings
- Use a vegetable peeler on a block of chocolate.
- For curls, heat the chocolate slightly before peeling.
Pros and Cons of Chocolate Shavings
| Pros | Cons |
|---|---|
| Adds texture and visual appeal | Can be messy if not handled carefully |
| Versatile for multiple desserts | Requires some practice to perfect |
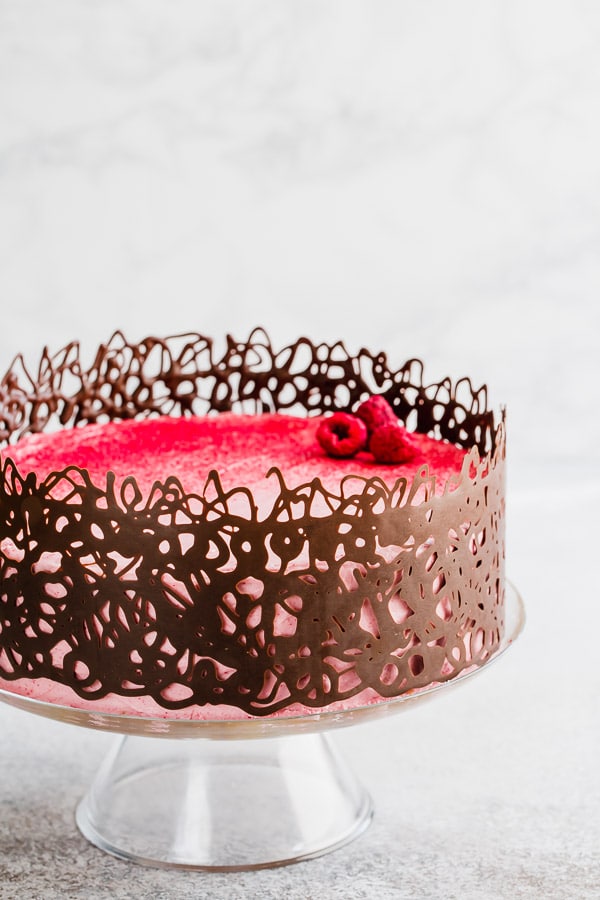
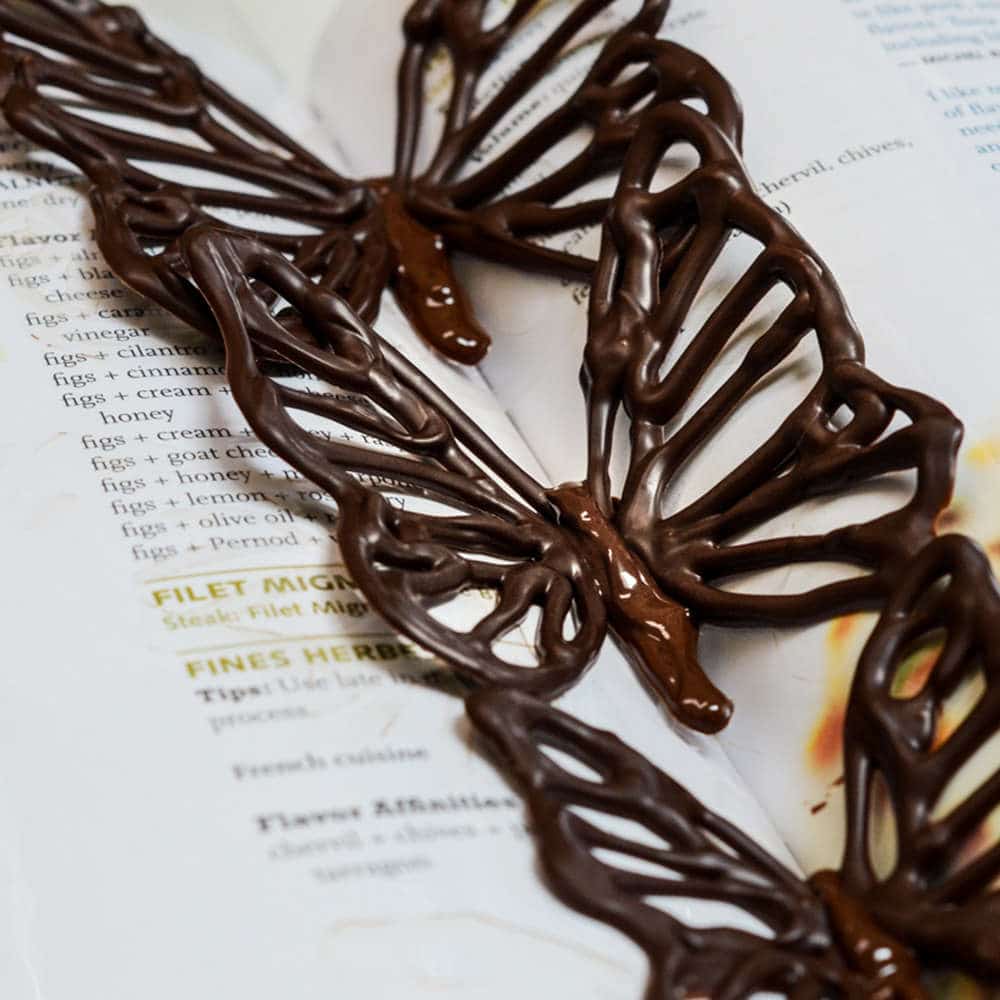
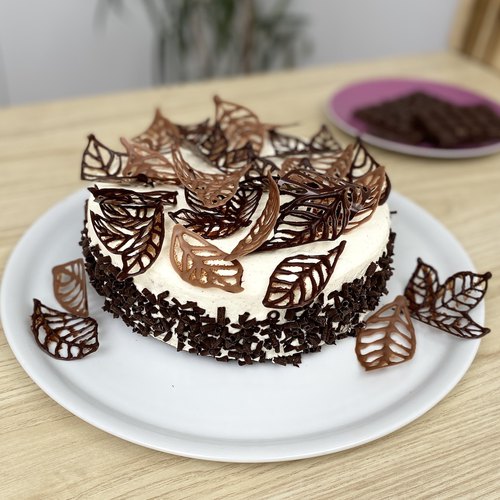
3. Piping Chocolate Designs
Piping melted chocolate can create intricate designs and patterns.
Steps to Pipe Chocolate
- Fill a piping bag with melted chocolate.
- Cut the tip to your desired size.
- Practice on parchment paper before applying to your dessert.
Creative Chocolate Decoration Ideas
Now that you know some techniques, let’s explore creative ideas to inspire you.
1. Chocolate Covered Fruits
Chocolate-covered fruits are a delicious and healthy decoration option. Use strawberries, bananas, or oranges for vibrant results.
2. Chocolate Dipped Cookies
Enhance your favorite cookies by dipping them in chocolate and adding sprinkles or nuts.
3. Themed Chocolate Decorations
For holidays or special events, create themed chocolate decorations, like chocolate pumpkins for Halloween or heart shapes for Valentine’s Day.
Common Mistakes to Avoid in Chocolate Decoration
Even seasoned decorators can run into pitfalls. Here are some common mistakes to watch out for:
- Improper Tempering: Failing to temper chocolate can lead to a dull finish and a brittle texture.
- Overheating Chocolate: Chocolate can seize when exposed to too much heat, ruining your decoration.
- Skipping Practices: Perfecting your skills requires practice, so don’t shy away from experimenting.
Maintaining Chocolate Decorated Items
After creating your chocolate masterpiece, it’s important to maintain its freshness and presentation.
- Store in a Cool, Dry Place: Keep decorated chocolates away from heat and humidity.
- Avoid Refrigeration: Refrigerating chocolate can cause condensation that ruins the texture.
Best Practices for Storage
- Use airtight containers to protect your decorations.
- Layer chocolates between parchment paper to prevent sticking.
FAQs About Chocolate Decoration
1. What type of chocolate is best for decorating?
Dark chocolate is often preferred for its richness and ability to hold shape, but consider the flavor preferences of your audience.
2. Can I use leftover chocolate for decorating?
Absolutely! Just make sure it’s tempered properly and free of any mix-ins that can affect the texture.
3. How do I achieve shiny chocolate decorations?
Proper tempering is crucial for achieving a glossy finish. When chocolate is tempered correctly, it will have a smooth, shiny appearance.
4. Can I use chocolate decorations on whipped cream or icing?
Yes! Chocolate decorations can enhance the presentation of whipped cream or icing, but apply them just before serving to maintain their integrity.
Final Thoughts on Chocolate Decoration
Decorating chocolate is an enjoyable and rewarding experience that elevates your dessert presentations. With the tips, techniques, and ideas shared in this guide, you are now equipped to create beautiful and delicious chocolate decorations. Remember, practice makes perfect, so don’t hesitate to try new designs and methods. The world of chocolate decoration is vast, so get creative and enjoy the process!