The festive season is upon us, and there’s nothing quite like the joy of giving and receiving beautiful Christmas baskets. Whether you’re preparing a gift for a loved one or looking to add a personal touch to your holiday celebrations, the art of decorating a Christmas basket can be both fun and rewarding. In this comprehensive guide, I will walk you through the step-by-step process of creating stunning Christmas baskets, sharing personal experiences, tips, tricks, and inspiration along the way.
Why Choose a Christmas Basket?
Christmas baskets are a versatile and heartfelt gift option. They can be tailored to suit any recipient’s taste and preferences, making them perfect for family, friends, and even coworkers. Here are a few reasons why you might consider creating a Christmas basket:
- Personalization: You can customize the contents to reflect the recipient’s interests.
- Creativity: Decorating a basket allows you to express your creativity and design skills.
- Practicality: Baskets can be filled with useful items that recipients will appreciate.
- Variety: You can create themed baskets, from gourmet food to spa essentials.
Choosing the Right Basket
The first step to decorating a Christmas basket is selecting the right basket. Here are some factors to consider when making your choice:
Size and Shape
Baskets come in various sizes and shapes. Consider the items you plan to include and choose a basket that complements them. For example:
| Size | Best For |
|---|---|
| Small | Goodies like candies, small skincare products, or gift cards. |
| Medium | Snack collections, bath products, or a combination of small gifts. |
| Large | Full-size gourmet foods, blankets, or a cozy movie night kit. |
Material
Baskets can be made from various materials, including wicker, fabric, and metal. Each material offers a unique aesthetic:
- Wicker: Classic and traditional, perfect for a rustic look.
- Fabric: Soft and cozy, ideal for a more modern, whimsical vibe.
- Metal: Sleek and chic, great for contemporary designs.
Picking a Theme
Once you’ve selected your basket, the next step is to decide on a theme. This will guide your choice of decorations and contents. Here are some popular themes:
Gourmet Food Basket
A gourmet food basket is perfect for foodies. Fill it with:
- Artisan cheeses
- Locally sourced jams
- Gourmet chocolates
- Fine wines or craft beers
Holiday Treats Basket
This theme is great for families with kids. Fill it with:
- Homemade cookies
- Hot chocolate mix
- Candy canes
- Festive snacks
Self-Care Basket
A self-care basket can include:
- Scented candles
- Luxurious lotions
- Bath bombs or salts
- A good book

Gathering Your Supplies
After selecting a theme, it’s time to gather supplies. You will need:
- Your chosen basket
- Fillers (e.g., shredded paper, fabric, or straw)
- Decorative items (e.g., ribbons, ornaments, or seasonal decorations)
- Your selected contents
Decorative Items to Consider
Enhancing your basket with decorative items can elevate its look. Here are some suggestions:
- Ribbons: Use festive ribbons to tie around the basket or as accents.
- Ornaments: Add sparkle with holiday-themed ornaments.
- Gift Tags: Personalize the basket with a heartfelt note.

Step-by-Step Decorating Process
Step 1: Prepare the Basket
Start by ensuring your basket is clean and dry. If it has handles, consider how you will display it.
Step 2: Add Fillers
Place your chosen filler at the bottom of the basket. This provides cushioning for your items and adds height.

Step 3: Arrange Your Items
Begin arranging your items in the basket. Place larger items at the back and smaller items at the front for visibility. Make sure to create visual interest by varying the height and texture of the items.
Example Arrangement
A visual layout might look like this:
- Large item (e.g., bottle of wine) at the back
- Medium items (e.g., cheese and crackers) in the middle
- Small items (e.g., chocolates) at the front

Step 4: Add Decorative Touches
Add ribbons, ornaments, and whatever decorative elements fit your theme. Be creative and have fun with it!
Step 5: Wrap It Up
If you wish, you can wrap your basket in cellophane for a polished look. Secure it with a bow for an extra touch of elegance.

Tips for a Memorable Christmas Basket
Creating a perfect Christmas basket is about attention to detail. Here are some tips I’ve picked up over the years:
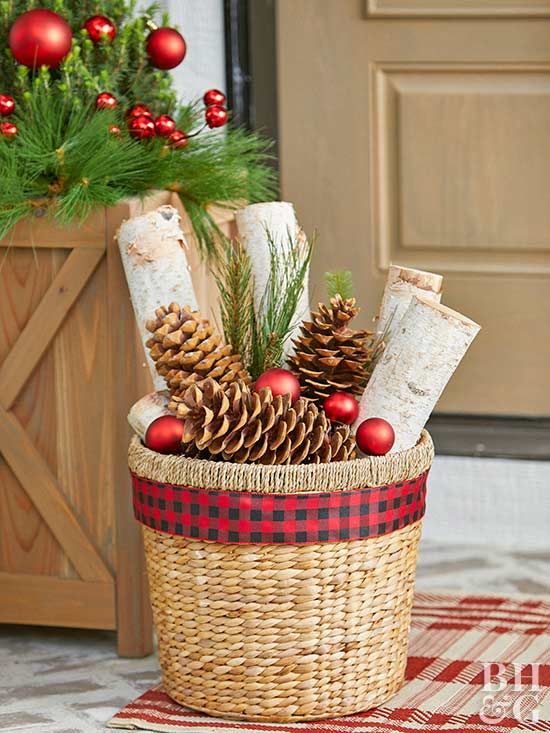
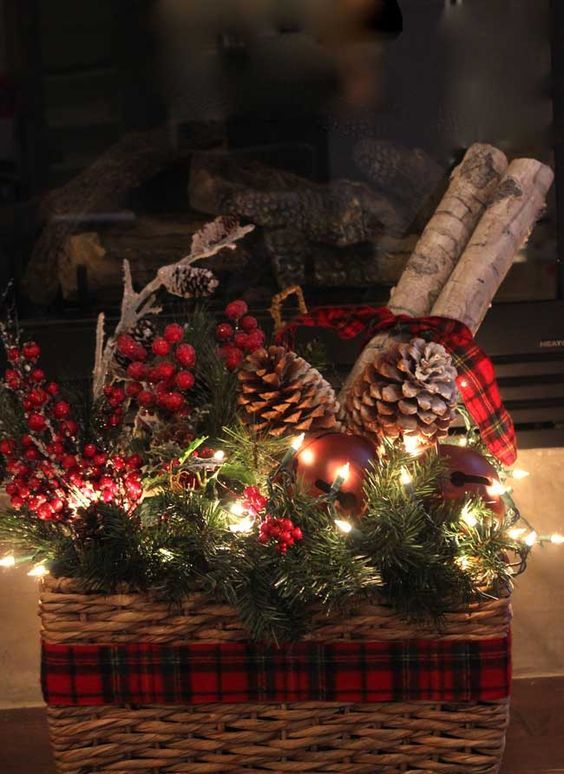
- Use Seasonal Elements: Incorporate elements like pinecones, evergreen sprigs, or holly to enhance the festive spirit.
- Personal Touch: Include a handwritten note or a photo frame with a picture of you and the recipient.
- Color Coordination: Stick to a color palette that complements the holiday theme.
- Practicality: Don’t forget to include consumable or usable items to avoid clutter.
Conclusion
Decorating a Christmas basket is an enjoyable and fulfilling way to spread holiday cheer. By selecting the right basket, choosing a theme, and carefully arranging contents, you can create a beautiful gift that your loved ones will cherish. Whether it’s a gourmet food basket or a self-care retreat, the possibilities are endless.
FAQs about Decorating Christmas Baskets
What items should I include in a Christmas basket?
Common items include gourmet foods, holiday treats, self-care products, and personalized gifts. Tailor the contents to the recipient’s preferences for a special touch.
How do I wrap a Christmas basket?
To wrap a Christmas basket, use clear cellophane, place the basket in the center, gather the cellophane at the top, and tie it with a festive ribbon. This adds an elegant finish.
Can I theme my Christmas basket?
Absolutely! Themed baskets can make gifts more meaningful. Some popular themes include gourmet food, holiday treats, and self-care.
What size basket should I use?
The size of the basket depends on the items you plan to include. Small baskets work for simple gifts, while larger ones can hold more elaborate assortments.
How do I personalize a Christmas basket?
You can personalize a Christmas basket by adding items that reflect the recipient’s interests, including a handwritten note, or customizing the decorations.
